
Apple hardware is expensive. But sometimes you just need a Mac, e.g. if you want to create an app for IOS. Of course, you don’t necessarily want to spend a few thousand euros on a Mac or Macbook if you already have a powerful Unraid server at home. That’s why YouTuber SpaceInvaderOne came up with something special: A Docker for Unraid, which makes it very easy to create a virtual Mac.
First we need the MacInABox Docker from the “Apps” tab, best just search for it. You don’t have an “Apps” tab? Then have a look here: install Community Applications Plugins.
With a click on “Install” you get the following view:
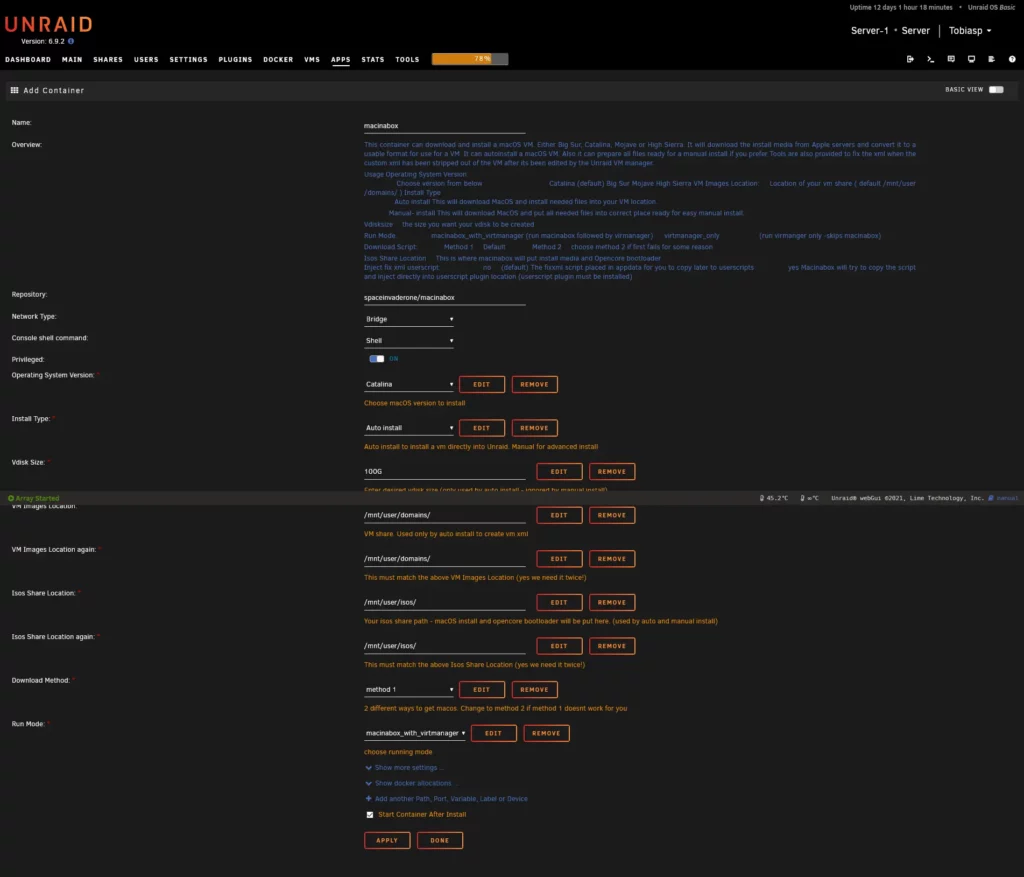
Install MacInABox Docker
There you can also select the MacOS version that you would like to have. Then you can select the hard disk size of the virtual hard disk, there you should select enough memory. 100GB are preselected. If you want to have more than one MacOS Vms, you have to select “macinabox_with_virtmanager” at the point “Run Mode”. The rest can be left as it is for a standard installation. With a click on “Done” the Docker is downloaded and installed.
After the installation, the container is started and must run for some time. Docker downloads some scripts in the background.
Run scripts
If the container has been running for a few minutes, you have to switch to “User Scripts” via “Settings”. Two new scripts have been created there.
Once the macinabox_helper and the macinabox vmready notify script.

The Vmready Notify Script must be executed first. If the script was executed successfully, a corresponding message appears in the upper right corner:
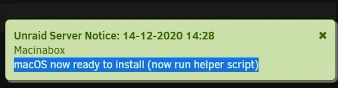
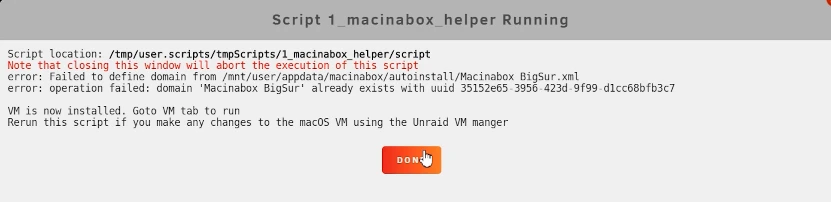
If this message appears, the other script, the “Macinabox helper”, can be executed. The VM was installed, a corresponding VM was created.
Setting up MacOS in the Virtual Machine
First you have to start the VM, with a click on VNC Remote, the screen of the VM opens. Now you have to select and confirm the “MacOS” base system.
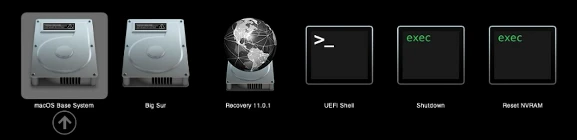
Starting the VM can take some time because it only starts with 2 CPU cores and little RAM.
When the loading process is finished, you will get to a selection screen. There you choose the “Disk Utility”
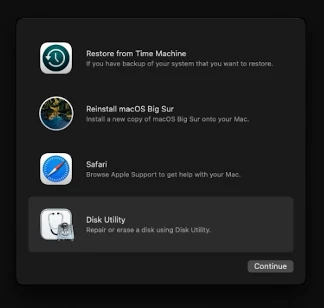
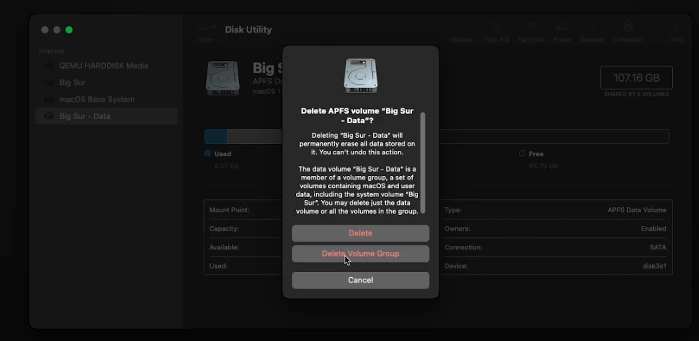
Now the hard disk called “MacOS Version – Data” must be formatted. Then a new partition must be created. Once the hard disk is formatted, the default settings can be left as they are, you must close the Disk Manager by clicking on the red dot.
Install macOS
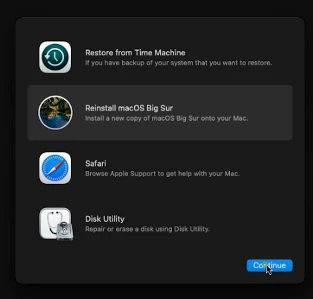
Now the item “Reinstall MacOS – Version” must be selected and confirmed with a click on “Continue”.
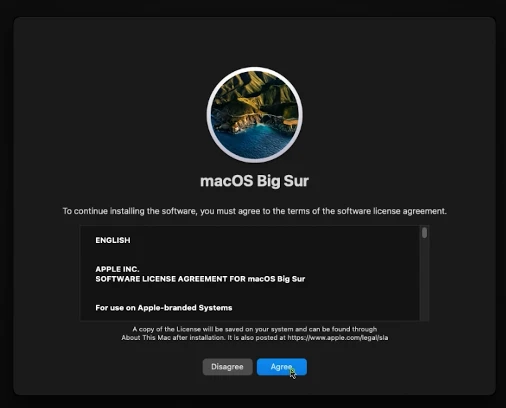
The following process will take some time. Now you still need to agree to the license agreement.
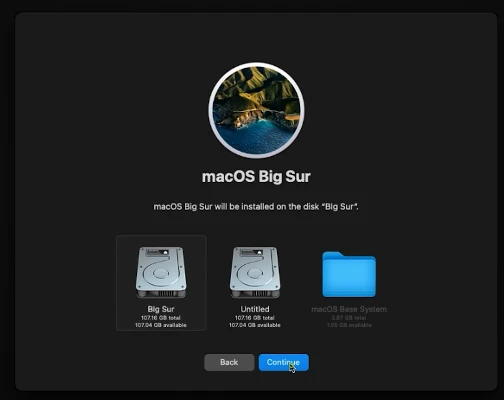
Then you select the hard disk (which has been formatted before) and MacOS is installed in the Unraid VM. This can again take a few minutes or even hours.
Once the installation is complete, the system restarts and boots normally. Now MacOS starts. Now you have to complete the self-explanatory setup. Until you arrive at the desktop.
OpenCore Configurator
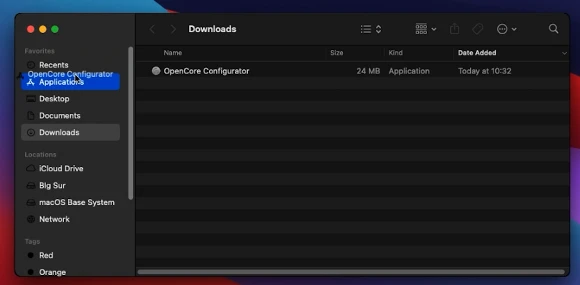
The next step is to download the OpenCore configurator. The best way to do this is to search for it on Google. With this tool, you can adjust the number of CPU cores, RAM, etc. To install the program, you have to activate “Foreign sources”.
Once the program is started, you will find the tool “Mount EFI” under “Tools” in the upper bar. There you have to mount the EFI and the MacOS Base partition. Then open the EFI partition and copy the files to the desktop. Once the files are copied open the EFI folder, OC and open the Config.plist file. Now you have to select another Apple device in the selection box. It is best to select the latest but still compatible Mac, the MacPro 2019. Save the file.
Go out of the VM and stop it.
VM Adjust
Now the VM can be adjusted, e.g. more CPU cores and more RAM can be assigned. Once you have finished the configuration, go to the “User Scripts” again, select the Macinabox helper and click on “Edit”.
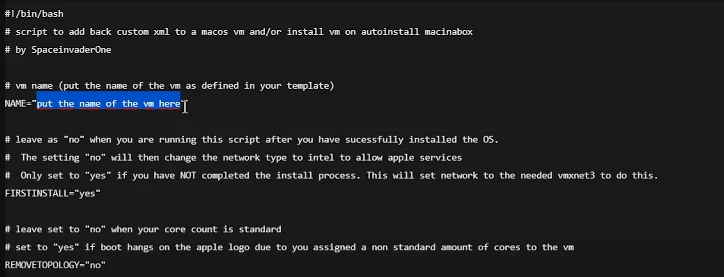
There you have to enter e.g. the VM name. This must be the exact name of the VM in Unraid. The point directly below “FIRSTINSTALL” must be set to “NO”. The changes are saved and the script must be executed. When the script has been executed, the VM is adjusted to your CPU and RAM settings. If the VM is now restarted you have macOS in a virtual machine under Unraid.
- Install “MacInABox” under Apps.
- Container Starts automatically and installs two scripts.
- Script: Run Vmready Notify Script.
- Script: Run Macinabox helper.
- Start the created VM and access it via VNC.
- Select “MacOS” Base System and confirm.
- Select the “Disk Utility” in the selection screen.
- Format the hard disk.
- Close “Disk Utility” and select “Reinstall MacOS – Version.
- Set up MacOS normally. (Self-explanatory)
- Download OpenCore Configurator.
- Accept “Foreign Sources”.
- Install OpenCore
- Run “Mount EFI” under “Tools” and select the MacOS Base Partition.
- Copy files of the Base Partition to the desktop.
- Open EFI folder, open OC folder and edit Config.plist file.
- Select the appropriate Apple device from the list and save.
- Stop VM.
- Adjust VM (CPU, RAM, USW)
- Under “User Scripts” change Macinabox helper name to VM name and under “FIRSTINSTALL” select No. Save changes and execute script.
- Start VM. Done.
I have done this now 4 time 1 to 3 hours each time and when done i have to start all over and installing so it dont work just an FYI
I can confirm that the tutorial works if you follow it properly. Thanks.